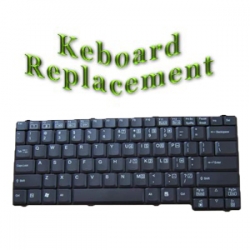
Laptop Keyboard Replacement

Repair and cleaning of a Laptop Keyboard is one of the services of computer repair miami, two devices on the laptop get the most use and abuse are the Video Screen and the keyboard. The keyboard gets a good workout every time you use the computer. Like all keyboards it is prone to collect dust, dirt, and other objects. Most keyboards fail from use not abuse. Some times you see the lettering worn off the keys, sometimes a key will pop off the underling support. Then there is the very thin ribbon cable, because it is very thin mylar plastic film with the copper traces embedded between the layers it will degrade with heat, along with this the connectors are also plastic and are very thin these also degrade with heat over time, i will not list the trouble shooting techniques here, if the keyboard is giving you problems it has failed, unfortunately there is very little or no repair for the keyboard. Even the laptop manufactures realize this, they do not require the old keyboard back when it is replaced under warranty.
To replace the keyboard you will need either a small cross point Phillips screw driver, a #1 or a small hex driver some have Allen wrench Compaq/HP uses a T8 hex, you do not have to disassemble the complete case to get the keyboard out. Most of the laptops I have worked on have screws that go through the case to the underside of the keyboard. Turn the computer upside down and remove the screws from the vicinity of the keyboard. Depending on the make any where from five to ten screws. Once you have the screws out, turn the computer over and open the video display, 90 to 120 degrees to get it out of the way. Using a small flat tip common screw driver lift the keyboard slightly from the front of the keyboard. Some keyboards have small tabs that insert into slots on the video side of the case. Lift the keyboard about 2 or 3 inches. Look inside and find the ribbon cable, you need to know how much cable you have loose before you lift the keyboard all the way out of the case. Because the keyboard has failed we really don’t care about the ribbon cable on the keyboard but do care about damaging the connector on the motherboard, so use caution when lifting the keyboard.
Check to see if the ribbon cable is held in place by any cable keepers, if so you will need to open them before lifting the keyboard out. Once you are sure you have cleared the ribbon cable you can lift the keyboard out and disconnect the ribbon cable. A word of caution, some ribbon cable connectors have a lock on them to keep them from working loose over time. If you don’t see or know how they work look at your replacement keyboard’s ribbon cable connector, now that you have it apart all you have to do is reverse the disassembly procedure to put it back together. Once you have it assembled, test it. Cleaning the keyboard to clean the keyboard you would treat it the same as a normal keyboard, I would suggest you power the computer down before starting, you don’t know what those stray key press will do when you aren’t looking at the screen.
I usually use a small stiff paint brush and a vacuum or canned air to clean out the dust and dirt, if you use a vacuum cleaner to suck out the dirt and dust don’t put the nozzle on the keys, good way to lose a couple of keys, they will get sucked up the hose. Using the paint brush try to move the dirt/dust to the center of the keyboard. This will enable you to get under the keys and have it all in one place to vacuum it out. If you use canned air, open the computer as normal and turn it on its edge, brush/blow the dust/dirt down the keyboard, you can use a glass cleaner to clean the grime off of the keyboard. As with the video spray the cleaner on the cloth. I don’t recommend a paper towel because it will disintegrate and leave pieces of paper in the keyboard. Leave the computer off for ten minutes or so to let any excessive glass cleaner evaporate. Miamicomputerrepairsite.com — enjoy your clean keyboard!
 Steven, L.


